 Reviews



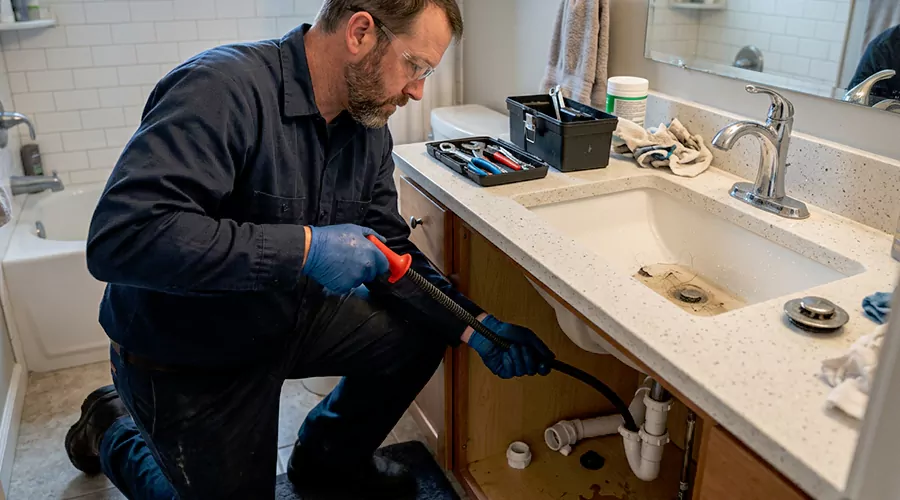
A bathroom sink drain is often unclogged fastest by removing the pop-up stopper and pulling out trapped hair. If the sink remains blocked, the next places to inspect are the P-trap and wall-side drain. DIY clearing can cost up to $25 while professional service averages about $250 in 2026. Sink drain replacement may be needed when the existing drain assembly is damaged, corroded, or no longer functions properly after cleaning.
The supplied term unclog bathroom sink drain is narrower than the broader bathroom sink query.
This guide therefore focuses on the drainage assembly rather than faucet or basin problems.
Where Does a Bathroom Sink Drain Usually Clog?
Most bathroom sink drain clogs begin at the pop-up stopper because its moving parts catch hair. The next likely location is the P-trap. A deeper blockage can form in the branch pipe after the trap when debris passes beyond the fixture.
- Think of the drain in three sections.
- The first is the stopper area.
- The second is the curved trap beneath the sink.
- The third is the pipe heading into the wall.
Working through those areas in order prevents unnecessary disassembly.
The supplied keyword bathroom sink drain belongs to this complete drain assembly.
How Can You Tell How Deep the Clog Is?
The amount of remaining drainage can help estimate clog depth. Hair visible around the stopper usually means a shallow blockage. A clean stopper combined with standing water shifts attention toward the P-trap. A clean trap with continued backup points farther into the branch pipe.
| Drain Condition | Likely Clog Location | First Action | 2026 Cost Exposure |
|---|---|---|---|
| Slightly slow | Stopper | Remove hair | Often DIY |
| Very slow | Tailpiece or trap | Clean P-trap | Up to $25 DIY |
| Fully blocked | Trap or branch drain | Hand snake | Around $250 professional |
| Several fixtures slow | Deeper piping | Wider diagnosis | Can cost more |
A basic DIY sink-drain clearing job can take about 30 to 45 minutes and cost up to $50 depending on tools.
The shallower the clog, the easier the repair usually is.
What Warning Signs Point to the Drain Assembly?
A drain clog affects how water leaves the basin rather than how water enters it. The faucet can work normally while the sink slowly fills because the waste side cannot keep up.
- Water stays in the basin after faucet use.
- The stopper has hair around its stem.
- The drain gurgles during emptying.
- The sink clears very slowly.
- Odor rises from the opening.
- The P-trap feels full after drainage stops.
- Plunging gives only temporary improvement.
- Water returns after the basin empties.
- A hand snake retrieves hair.
- A nearby drain begins gurgling.
The supplied keyword clogged sink drain matches this drain-specific problem state.
A faucet problem does not create these drainage symptoms.
Step 1: Remove the Pop-Up Stopper
The pop-up stopper should be checked before deeper drain work because it is the closest place for hair to collect. Some stoppers lift out directly. Others are secured by a pivot rod beneath the sink.
- Place a bucket beneath the drain.
- Find the pivot rod.
- Loosen its retaining nut.
- Pull the rod back.
- Lift the stopper.
- Clean the stopper thoroughly.
- Look into the tailpiece.
- Pull out visible hair.
- Reinsert the stopper only after the drain opening is clear.
This step can solve the problem without opening any waste piping.
Step 2: Use a Flexible Hair Tool
A plastic hair tool can reach below the stopper and pull out strands that are not visible from above. It works best when the blockage is in the tailpiece rather than the P-trap.
- Insert the tool carefully.
- Push only until it reaches resistance.
- Rotate slightly.
- Pull upward.
- Dispose of the debris.
- Repeat until little material returns.
- Flush with warm water.
Avoid forcing the strip around a sharp obstruction.
The goal is retrieval rather than pushing the clog deeper.
Step 3: Plunge the Drain
Plunging can move a blockage that sits below the stopper area. Seal the overflow hole first so pressure does not escape through it.
- Add a few inches of water.
- Cover the overflow with a wet cloth.
- Center a small sink plunger.
- Push down firmly.
- Pull upward.
- Repeat for about 20 seconds.
- Remove the plunger.
- Watch the water.
A fast drop shows that the obstruction moved.
Continue to test because a partial opening can still clog again.
Step 4: Remove the P-Trap
The P-trap is the next inspection point when surface methods fail. It sits directly beneath the sink and often captures hair or small objects.
- Place a bucket below the trap.
- Loosen both slip nuts.
- Lower the trap slowly.
- Empty the standing water.
- Remove debris.
- Clean the trap.
- Inspect its washers.
- Reinstall it.
- Run water.
- Check every joint.
The supplied keyword bathroom sink plumbing fits this visible under-sink system.
Do not overtighten plastic fittings.
Step 5: Snake the Branch Drain
A clean P-trap combined with continued backup points toward the pipe entering the wall. This is where a manual auger becomes useful.
- Remove the trap.
- Feed the cable into the wall-side opening.
- Advance slowly.
- Rotate when resistance appears.
- Retract slightly.
- Advance again.
- Pull the cable out carefully.
- Clean the end.
- Repeat when flow improves.
Current 2026 sink-clearing guidance describes a manual snake as the normal next tool for clogs beyond the trap.
Do not use excessive force.
The supplied keyword sink drain pipe applies to this deeper section.
How Do You Reassemble the Drain Without Creating a Leak?
A drain that has been cleared still needs correctly aligned connections. Slip washers should sit evenly and the trap should line up naturally with the tailpiece and wall pipe. A twisted connection can leak even if the clog is gone.
- Clean the connection surfaces.
- Check each washer.
- Align the trap.
- Thread the slip nuts by hand.
- Tighten them until secure.
- Run a small water test.
- Inspect the joints.
- Then release a larger basin of water.
PVC P-trap parts typically cost $5 to $50 in 2026.
Replace a cracked fitting rather than tightening it harder.
What Should You Avoid?
Avoid starting with harsh chemical drain opener when hair can be reached mechanically. A chemical left in standing water can create a splash hazard if you later remove the trap.
- Do not mix cleaning products.
- Avoid forcing metal tools against finished sink surfaces.
- Do not snake a drain containing unknown chemicals.
- Do not overtighten plastic connections.
- Do not push a visible object farther down the pipe.
Mechanical clearing gives you greater control over what happens inside the drain.
How Can You Test the Drain After Clearing It?
A clear drain should empty a partly filled basin quickly and without gurgling. Testing with a larger water volume reveals partial restrictions that a weak faucet stream can miss.
- Reassemble the drain.
- Run water slowly.
- Check for leaks.
- Close the stopper.
- Fill the basin partway.
- Release the stopper.
- Watch the drainage speed.
- Inspect the P-trap.
The supplied keyword sink drainage describes the performance you are testing.
A sink that hesitates under a full basin release may still contain a restriction.
When Should You Call a Professional?
Professional help is appropriate when the branch drain remains blocked after a hand snake attempt or when other fixtures become slow. A deeper line obstruction may sit beyond the reach of household tools.
Professional drain cleaning costs $147 to $352 in 2026. The average is about $246. Bathroom sink unclogging is commonly around $250.
Consider professional diagnosis when:
- Several fixtures are slow.
- The trap is clean.
- A hand snake does not restore drainage.
- The clog returns quickly.
- Drain joints are damaged.
- Wastewater returns through the sink.
Deeper pipe inspection can locate problems that cannot be seen through the bathroom drain.
How Can You Prevent Drain Clogs?
Bathroom sink drain maintenance begins at the stopper. Removing hair before it moves into the trap prevents many common blockages.
- Clean the stopper every week or two.
- Pull visible hair.
- Rinse grooming residue from the basin.
- Inspect the drain when water becomes slower.
- Keep small objects away from the opening.
- Clean the P-trap when recurring debris collects.
Early cleaning is much easier than opening a completely blocked branch drain.
Conclusion
To unclog a bathroom sink drain, work through the drainage system in order. Clean the pop-up stopper first. Use a plastic hair tool next. Plunge before opening the P-trap. If the trap is clear, use a manual snake through the wall-side drain. When other fixtures become slow or a hand snake cannot reach the restriction, professional drain cleaning may be appropriate.
Frequently Asked Questions
Where do bathroom sink clogs usually form?
Hair commonly collects around the pop-up stopper. The P-trap is another common blockage location.
Can I snake a bathroom sink through the drain opening?
Sometimes. Removing the stopper or P-trap often gives the cable better access.
Why does the sink drain slowly after the P-trap is cleaned?
The obstruction may be farther inside the branch pipe.
Should there always be water in the P-trap?
Yes. The standing water blocks sewer gas from entering the bathroom.
Why does my bathroom drain gurgle?
A restriction can disturb airflow inside the drain. Widespread gurgling can point toward a deeper plumbing issue.